Hand-held Retro-Gaming with Retropie on a Raspberry Pi Zero W
Retro-Gaming
When I was in 5th or 6th grade I went over to one of my friend’s house to play the Xbox. When I showed up he was playing Super Mario World with an Xbox controller in-hand. At first I thought, “How awesome of Microsoft to put Super Mario World on an Xbox disc.” However, I was wrong in my assumption. My friend’s Xbox was running an emulator of the SNES and was running a ROM of Super Mario World. Now I couldn’t believe how awesome this was. Yet, I must admit when he was telling me it is running an emulator of a SNES running a ROM; I had no idea what he was talking about. To be honest, I don’t think he did, because he said his uncle built it for him.
Why am I telling you about a childhood memory of mine where my mind was blown. Well, frankly it is because for years memories of playing old systems, and arcades on my friends Xbox would occasionally have me wondering how his uncle did that. Years after that experience and wondering I came across the Raspberry Pi, and if you take a look around my website you will see how I am greatly found of this little credit card size computer.
After discovering the Raspberry Pi, I would often look and try to find new ways to use it. This is when I came across RetroPie. RetroPie is a way to run Emulators of old gaming systems, like the SNES and MAME on the Raspberry Pi. Seeing RetroPie instantly took me back to those fond child memories, of playing emulators on an Xbox. I was greatly intrigued.
Retro-Gaming with RetroPie on a Raspberry Pi
A co-worker of mine had went to a Hacker/Cyber Security conference called SAINTCON a few times. When you go to Hacker events they usually have some cool project using Raspberry Pis, Arduinos, and other electronic gadgets to make name badges for their participants.
Co-worker had these @SAINTCON badges laying around. Gave them to me saying, “make something with em” Thinking about using them for a @RetroPieProject . Any thoughts or project ideas. #Wemosd1mini #raspberrypi pic.twitter.com/m1FJwA1F4Z
— AkaSoggybunz (@AkaSoggyBunz) September 27, 2018
SAINTCON Badges
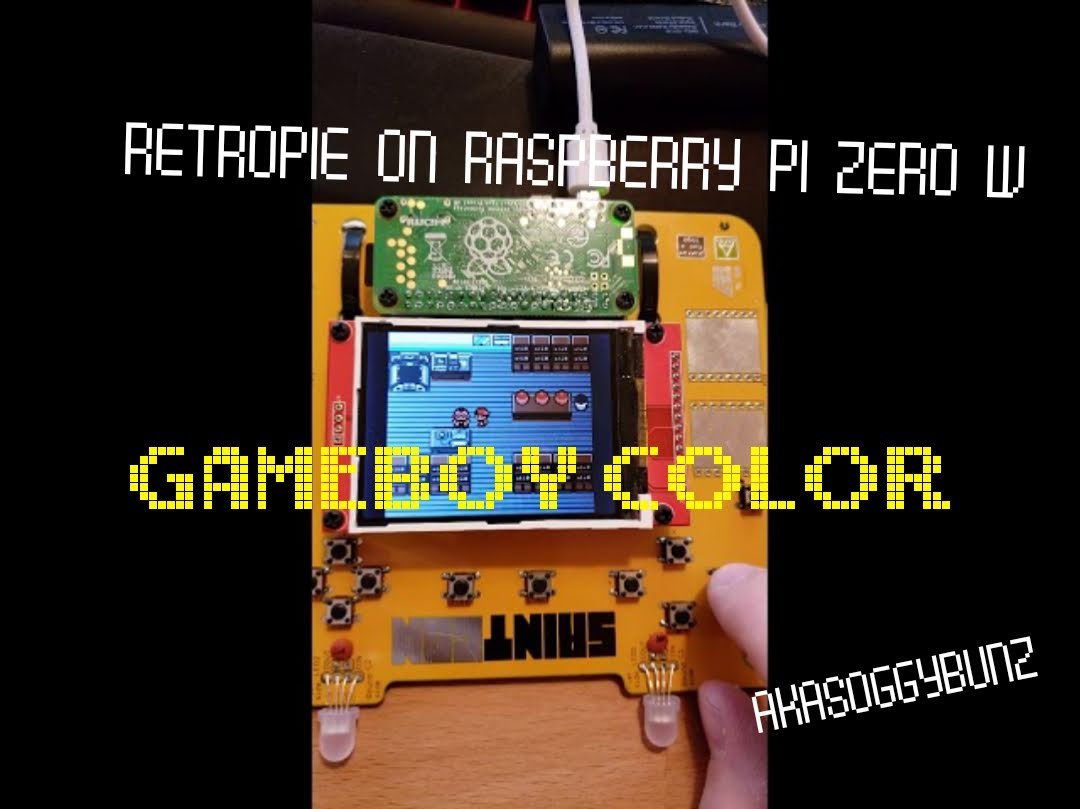
For the 2017 SAINTCON Badge they used a Raspberry Pi Zero W, with a 2.8” TFT 240×320 Color Display. The PCB has buttons that match the SNES controller layout. Naturally when my co-worker gave these to me, my mind immediately thought about turning the badge into a RetroPie.
Getting RetroPie to Work on the Raspberry Pi
I began by flashing the SD card with a fresh install of RetroPie, and booting up the Raspberry Pi. To my dismay the screen that was attached on the badge didn’t turn on. I then proceeded to SSH into the Pi. Did a sudo raspi-config, found the settings for enabling SPI, and rebooted the Raspberry Pi Zero W. Upon reboot still no screen. I decided I was going to get RetroPie working on this setup no matter what. So, I dissembled the badge by removing the Raspberry Pi and display.
After removing the Raspberry Pi and display, I placed the display into a breadboard. I then found a GitHub repository that said how to get this display working with a Raspberry Pi. Wired up the Pi to the correct Pins on the Raspberry Pi. Entered in a few configuration commands to get the screen to work. This worked by mirroring what the GPU was displaying over the GPIO pins of the Raspberry Pi. This time when I booted the raspberry Pi, Eureka! It worked! I was so excited. Naturally I plugged in an Xbox 360 controller to the Raspberry Pi, and mapped it to RetroPie. I finally got it working. I then moved over a couple of ROMs for the SNES and Gameboy Color, and enjoyed myself for a few hours.
Made some progress on the @RetroPieProject from the 2017 @SAINTCON badge. Stay tuned for more pic.twitter.com/VxTs5s9SVz
— AkaSoggybunz (@AkaSoggyBunz) October 1, 2018
This is a video of the RetroPie on the Raspberry Pi Zero W with the display plugged into the bread board.

RetroPie on the SAINTCON Badge
After getting RetroPie Working on the Raspberry Pie Zero W off of the SAINTCON badge, I was browsing twitter. While browsing twitter I saw that L34N had left a comment on my tweet about receiving the badges from a co-worker. In his comment was a link to a GitHub repository. The link contains instructions on how to convert the 2017 SAINTCON badge into a RetroPie device. This was great news to me, as it meant I would be able to use the native SNES controller layout buttons.

RetroPie on the Badge
After following the instructions found on the Github link, I was able to successfully get RetroPie working.
I using the Badge makes it look really neat.
Conclusion for Now
I still don’t know if the badge, although very cool; is the complete design I want for my hand-held RetroPie. I am considering tearing all the components off. I still may use the PCB section that has the SNES controller on it. I want to take all these components and put them into a more compact version. If you have any ideas on what I should do, leave a comment below.
I think it is awesome the things the Maker/Hacker community come up with. For example an awesome way to play Retro Games on a Raspberry Pi, or an event as great as SAINTCON. It is these communities and people which continue to astound me. Just like that time in 5th or 6th grade when I was able to play a Nintendo game on an Xbox. I just want to give a shout-out to all these folks, and tell them, they continue to inspire every day. I am grateful for the time and commitment each one has to the community, and I look forward to seeing what they do next.
Ꮃhat’s Taking place i’m new to this, I stumbled upon this
I’ve found It absolutеly useful and it has aided me oսt
loads. I hope to give a contribution & assist different users like its helped me.
Great job.